Introduction
When you send an Apple Mac to us for repair, for certain repairs (hard drive replacement, SSD installation, data recovery or similar), it's necessary to remove the Mac from your iCloud device list.
Important Note: Please make sure to click the "Remove This Device" button (described below) and not "Erase This Device". If you press "erase", all data on the Mac will be permanently deleted!

Remove the Mac from the list using iPhone and the "Find My" app
When we ask you to remove your Mac from your iCloud device list, it may be that you no longer have access to the Mac because it won't start.
In this case, the easiest way to remove the Mac from your iCloud device list is using the "Find My" app on your iPhone.
- Unlock your iPhone.
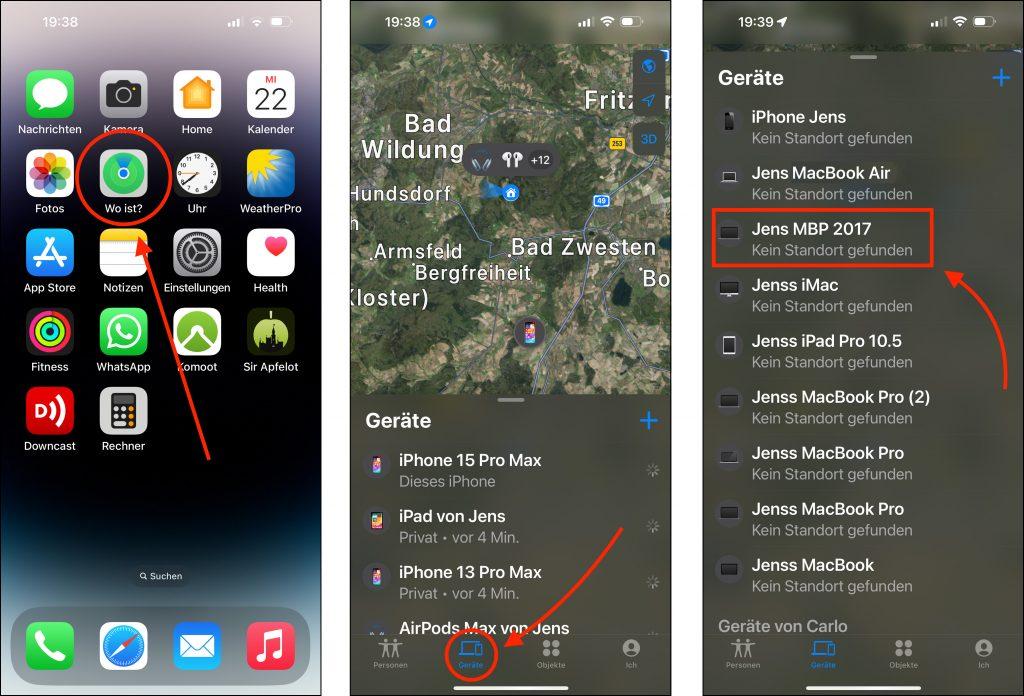
- Open the "Find My" app.
- Tap "Devices" at the bottom of the app.
- In the following list, find and select the Mac you want to remove.
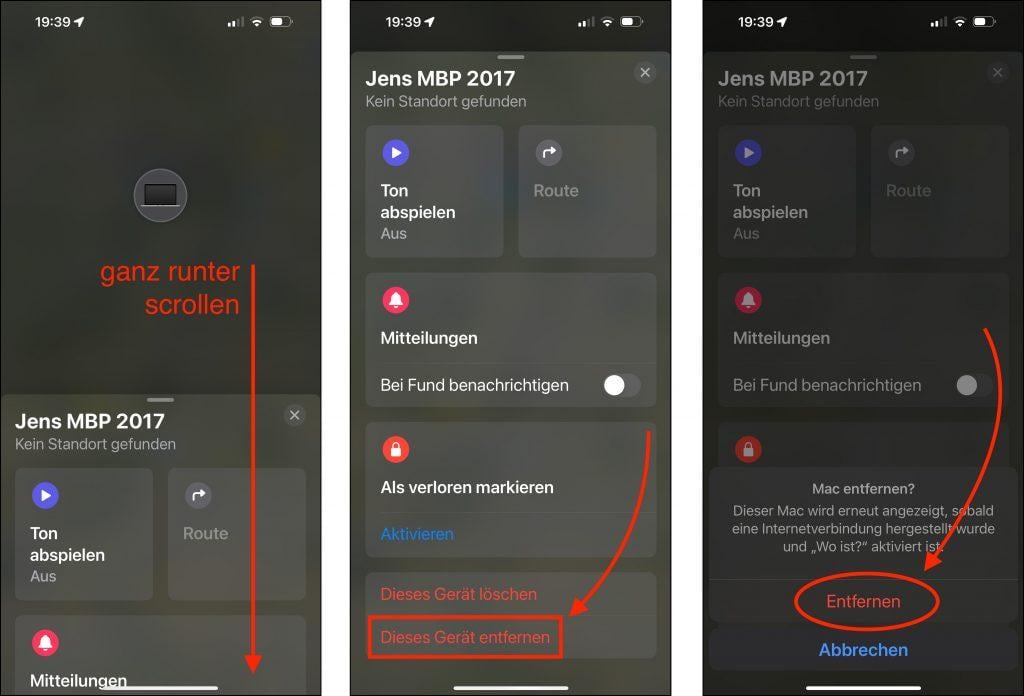
- On the next page, scroll all the way down.
- Here, tap "Remove This Device".
After confirmation, the device will be removed from the list and you can send the Mac to us.
Screenshots – how it works on iPhone
To show you how the process works in detail, we've compiled screenshots of the procedure.
Need help with Mac problems? Talk to us!
If you're having problems with your MacBook Pro, MacBook Air or iMac that can't be solved, please contact us. We've seen almost everything and have a heart for old Mac models too.
If your MacBook is acting up, a repair with us is often easier and cheaper than you think.